How to Easily Build a Powerful Custom AI Chatbot Using OpenAI API

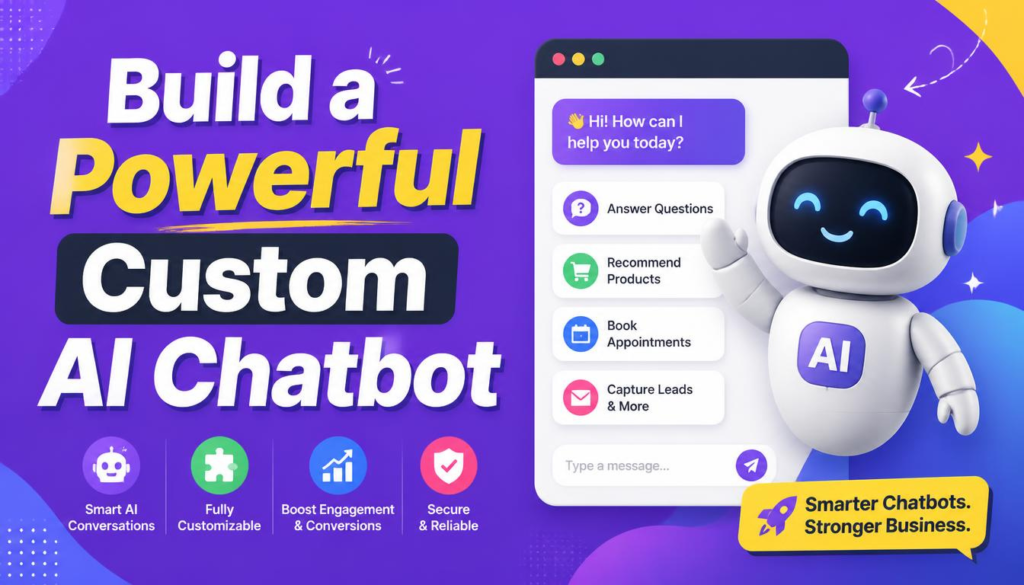

A website chatbot can answer customer questions, explain products, help visitors find information, and provide support 24/7. Thanks to modern AI APIs, you no longer need to build your own language model. You can connect your website to an AI model through an API and create a chatbot that understands natural language questions.
This guide will show you how to build a custom AI chatbot for your website using the OpenAI API. We’ll cover the basic architecture, project setup, backend API, frontend chat interface, conversation history, security, testing, and deployment.
The example uses Node.js and JavaScript because they are popular for web apps. OpenAI’s official JavaScript SDK works with modern Node.js environments effortlessly.
What Is an AI Chatbot?
An AI chatbot is a software application that communicates with website visitors using natural language processing.
A traditional chatbot might use fixed rules, like:
“If the visitor selects ‘Pricing,’ show the pricing page.”
But when you build a custom AI chatbot, it can handle more flexible and complex questions. For example, a visitor might ask:
“Which plan is best for a small online store with five employees?”
The chatbot can understand the context and generate a conversational response based on the instructions and information it’s given.
For a business website, a custom chatbot can answer questions about:
- Products and services
- Pricing structures
- Business operating hours
- Shipping and returns
- Company policies
- Technical support and FAQs
How a Website AI Chatbot Works
Before coding, it’s helpful to understand the basic architecture required to build a custom AI chatbot.
┌─────────────────────────────────────────────────────────────────────────┐
│                      AI Chatbot Request Flow                            │
├──────────────┐      ┌──────────────┐      ┌──────────────┐      ┌───────┤
│   Visitor    │ ───► │  Your Web    │ ───► │ Your Backend │ ───► │ OpenAI│
│  (Browser)   │ ◄─── │  Frontend    │ ◄─── │ Server (Node)│ ◄─── │  API  │
└──────────────┘      └──────────────┘      └──────────────┘      └───────┘
A simple chatbot architecture consists of three main components:
- Website Frontend: The user chat box that collects messages and displays AI replies.
- Backend Server: Receives messages from the browser and sends them to the OpenAI API. This is where you keep your API key secure. Never put your API key in the browser code.
- OpenAI API: Processes incoming requests and returns AI-generated responses.
Prerequisites Before You Build a Custom AI Chatbot
Before writing code, make sure you have these core tools ready on your environment:
- Basic HTML, CSS, and JavaScript knowledge (refer to MDN Web Docs)
- Node.js installed (download from Node.js Official Site)
- An active OpenAI API account and key generated from OpenAI Platform
- A code editor like VS Code and a local development server
A framework like Express is helpful for the backend, but the overall approach works with other Node.js tools too.
Step 1: Create Your Project Workspace
To start learning how to build a custom AI chatbot, open your terminal, create a new folder, and initialize Node.js:
Bash
mkdir ai-website-chatbot
cd ai-website-chatbot
npm init -y
Next, install the required dependencies:
Bash
npm install express openai dotenv cors
The openai package is the official JavaScript SDK. Install it via npm for Node.js, Deno, or Bun applications.
Step 2: Store Your API Key Securely
When you build a custom AI chatbot, protecting credentials is crucial. Create a .env file in your root folder:
Code snippet
OPENAI_API_KEY=your_actual_openai_api_key_here
PORT=3000
Never put your API key in public HTML or frontend JS files. Add .env to your .gitignore file:
Code snippet
node_modules/
.env
This keeps your secrets out of public repositories.
Step 3: Create the Backend Server
Create a file named server.js. This acts as the secure server layer when you build a custom AI chatbot:
JavaScript
import express from "express";
import cors from "cors";
import dotenv from "dotenv";
import OpenAI from "openai";

dotenv.config();

const app = express();

app.use(cors());
app.use(express.json());
app.use(express.static("public"));

const client = new OpenAI({
  apiKey: process.env.OPENAI_API_KEY
});

app.post("/api/chat", async (req, res) => {
  try {
    const { message } = req.body;
    if (!message || typeof message !== "string") {
      return res.status(400).json({ error: "Message is required." });
    }

    const response = await client.chat.completions.create({
      model: "gpt-4o-mini",
      messages: [
        {
          role: "system",
          content: "You are a helpful website assistant. Answer clearly and concisely. If you do not know something, say so instead of inventing information."
        },
        { role: "user", content: message }
      ],
      temperature: 0.7,
      max_tokens: 300
    });

    res.json({ reply: response.choices[0].message.content });
  } catch (error) {
    console.error("OpenAI API Error:", error);
    res.status(500).json({ error: "Something went wrong." });
  }
});

const PORT = process.env.PORT || 3000;
app.listen(PORT, () => {
  console.log(`Server running at http://localhost:${PORT}`);
});
Pick your model based on your needs and budget. OpenAI’s API offers several models with different speed and intelligence capabilities.
Step 4: Create the Website Chat Interface
Create a public folder and add an index.html file inside:
HTML
<!DOCTYPE html>
<html lang="en">
<head>
  <meta charset="UTF-8">
  <meta name="viewport" content="width=device-width, initial-scale=1.0">
  <title>AI Website Chatbot</title>
  <style>
    body { font-family: system-ui, -apple-system, sans-serif; max-width: 600px; margin: 40px auto; padding: 20px; background: #f9f9f9; }
    #chat { border: 1px solid #e0e0e0; height: 380px; overflow-y: auto; padding: 15px; background: #fff; border-radius: 8px; margin-bottom: 15px; }
    .input-group { display: flex; gap: 10px; }
    input { flex: 1; padding: 12px; border: 1px solid #ccc; border-radius: 6px; }
    button { padding: 12px 24px; background-color: #0d6efd; color: white; border: none; border-radius: 6px; cursor: pointer; }
  </style>
</head>
<body>
  <h1>Ask Our AI Assistant</h1>
  <div id="chat"></div>
  <div class="input-group">
    <input id="message" type="text" placeholder="Ask a question..." />
    <button onclick="sendMessage()">Send</button>
  </div>
  <script src="chat.js"></script>
</body>
</html>
Step 5: Connect the Frontend to Your Backend
Create public/chat.js to connect client interactions to your server:
JavaScript
async function sendMessage() {
const input = document.getElementById("message");
const chat = document.getElementById("chat");
const message = input.value.trim();
if (!message) return;
chat.innerHTML += `<p><strong>You:</strong> ${escapeHTML(message)}</p>`;
input.value = "";
try {
const response = await fetch("/api/chat", {
method: "POST",
headers: { "Content-Type": "application/json" },
body: JSON.stringify({ message })
});
const data = await response.json();
chat.innerHTML += `<p><strong>AI:</strong> ${escapeHTML(data.reply)}</p>`;
} catch (error) {
chat.innerHTML += `<p style="color:red;"><strong>Error:</strong> Unable to contact the chatbot.</p>`;
}
}
function escapeHTML(str) {
return str.replace(/[&<>'"]/g,
tag => ({ '&': '&', '<': '<', '>': '>', "'": ''', '"': '"' }[tag] || tag)
);
}
This way, the browser sends the user’s message to your backend—not directly to OpenAI—keeping your API key secure.
Step 6: Give Your Chatbot a Specific Role
Generic chatbots may give vague answers. Improve yours by configuring explicit system role instructions:
JavaScript
const systemPrompt = `
You are the customer support assistant for Example Store.
Your responsibilities:
- Answer questions about products.
- Explain shipping and return policies.
- Keep responses short and friendly.
- Never invent prices or policies.
- If information is missing, tell the customer to contact support.
`;
Well-written instructions set the chatbot’s purpose, tone, and operational boundaries.
Step 7: Add Conversation History Context
A good chatbot needs memory context. For example:
Visitor: What laptops do you sell?
AI: We offer several laptop models including ultrabooks and gaming rigs.
Visitor: Which is best for programming?
The second question depends on the first. Maintain context when you build a custom AI chatbot by storing recent message history arrays and submitting them with each API request. Avoid sending unbounded history to limit costs.
Step 8: Connect Your Chatbot to Business Knowledge
Make your chatbot more useful by providing access to real business information—like product docs, FAQs, policies, or help articles. Building a Retrieval-Augmented Generation (RAG) pipeline lets your backend fetch relevant text blocks and include them directly inside the context prompt.
OpenAI’s file search and vector retrieval tools help streamline this workflow, making your assistant vastly more accurate. For broader web architectural setups, see our guide on How Software Integration Works.
Step 9: Add Safety and Input Validation
Never trust unvalidated user input. Your backend should screen requests before sending payloads to the OpenAI API:
JavaScript
if (
  typeof message !== "string" ||
  message.length === 0 ||
  message.length > 4000
) {
  return res.status(400).json({ error: "Invalid input length." });
}
Key technical security checks to implement:
- Rate limiting: Prevent API abuse using middleware like
express-rate-limit. - Input sanitation: Guard against injection attempts.
- OpenAI Moderation API: Classify potentially toxic or harmful content automatically.
Step 10: Protect Customer Data
Chatbots frequently receive sensitive user data. Limit personal data collection, retain data only when necessary, and ensure compliance with global data protection regulations. Review your hosting, analytics, and database privacy settings carefully.
Step 11: Test Your Chatbot Thoroughly
Test your assistant with typical scenarios:
- “What products do you sell?”
- “How long does shipping take?”
- “Can I return an item after 30 days?”
- “What are your opening hours?”
Also test how the chatbot responds when it doesn’t have the answer—it should admit its lack of knowledge rather than hallucinate false answers.
Step 12: Improve the User Experience (UX)
Upgrade your chat UI with production features:
- Typing indicators and loading animations
- Message timestamps and persistent session states
- Suggested quick-reply buttons
- Mobile-responsive interface styling
- Human support escalation triggers
- Streaming responses via Server-Sent Events (SSE) so users see tokens as they generate
Common Mistakes to Avoid When You Build a Custom AI Chatbot
| Common Pitfall | Technical Impact | Correct Solution |
|---|---|---|
| Exposing API Keys | Key theft and budget exhaustion | Route all requests through a Node.js backend |
| No Context Memory | Chatbot forgets previous answers | Send a rolling array of prior context turns |
| Blind Model Trust | AI hallucinates fake prices/policies | Set strict system prompts and boundary rules |
| Unrestricted Inputs | Vulnerable to spam and costly requests | Enforce rate limits and character caps |
How Much Does It Cost to Build an AI Chatbot?
Operational costs depend on model choice, usage volume, request length, hosting infrastructure, and vector database features. OpenAI operates on a usage-based pay-as-you-go model.
Starting with lightweight models like gpt-4o-mini keeps costs minimal while testing real-world site interaction metrics.
AI Chatbot Component Overview
| Component | Operational Purpose |
|---|---|
| Website UI | Collects visitor inputs and renders responses |
| Backend API | Processes requests securely and hides secrets |
| OpenAI API | Handles natural language processing |
| Knowledge Base | Supplies proprietary business facts (RAG) |
| Rate Limiter | Controls excessive request flooding |
| Human Escalation | Hands off complex cases to support agents |
Complete Launch Checklist
┌─────────────────────────────────────────────────────────────┐
│                    Launch Readiness Checklist               │
├─────────────────────────────────────────────────────────────┤
│ ☐ Keep API keys strictly inside backend .env variables      │
│ ☐ Implement request rate limiting and payload validation    │
│ ☐ Configure domain system instructions and tone bounds     │
│ ☐ Verify mobile responsiveness and accessible UI design     │
│ ☐ Enable usage spending limits on OpenAI Dashboard          │
│ ☐ Add fallback route for human support escalation           │
└─────────────────────────────────────────────────────────────┘
Conclusion
Learning how to build a custom AI chatbot for your website doesn’t require training a machine learning model from scratch. By using a secure Node.js backend to interface with the OpenAI API, you can deliver an intelligent, responsive assistant that supports visitors around the clock.
Start simple, enforce strict input security, incorporate domain knowledge, and continuously refine user experience features as your audience grows.
Frequently Asked Questions (FAQs)
What power word is used in this article’s Title?
Words like Powerful, Easily, or Ultimate act as power words that boost search CTR by making the guide feel comprehensive and actionable.
What is the ideal keyword density for SEO plugins?
For target phrases like Build a Custom AI Chatbot, aim for a density between 1.0% and 1.5%. This ensures search engines recognize your core topic without triggering keyword stuffing warnings.
Can I run an OpenAI chatbot directly in frontend JavaScript?
No. Exposing your OpenAI API key in client-side code allows anyone to view and abuse your credentials. Always process requests through a backend server.